Night photography transforms ordinary scenes into visually rich compositions where light, motion, and atmosphere interact in unexpected ways. However, capturing compelling images after sunset requires more than simply increasing exposure—it demands deliberate control over shutter speed, aperture, ISO, and focus strategy.
Each night scene behaves differently depending on available light sources, weather conditions, and subject movement. With understanding how to adjust your camera settings for specific night-time scenarios, you can move beyond technical trial-and-error and begin crafting images with intention, depth, and precision.
1. Capturing Star Trails Through Long Exposure Control
Star trails are created by the Earth’s rotation, which makes stars appear to arc across the sky when recorded over extended exposure times. To achieve this effect, photographers typically rely on a stable tripod and extremely long shutter durations ranging from several minutes to even longer composite exposures.
A wide aperture such as f/2.8 helps gather faint starlight efficiently, while keeping ISO as low as possible preserves image quality by reducing digital noise. Instead of pressing the shutter manually, using a remote trigger or built-in timer prevents subtle vibrations that can blur fine star paths. The resulting image transforms the night sky into circular or linear light patterns, visually revealing celestial motion that is invisible to the eye.
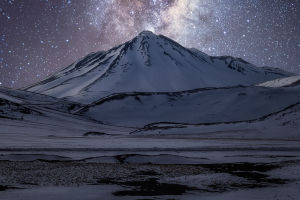
2. Balancing Moonlit Landscapes for Natural Illumination
Photographing landscapes under moonlight requires careful exposure balancing because the scene often contains both extremely bright and very dark areas. A full moon can act as a natural light source strong enough to illuminate terrain, while partial moonlight creates softer, more atmospheric contrast.
In such conditions, photographers usually work with low ISO settings to maintain detail in darker regions while avoiding overexposure from reflective surfaces. Aperture settings are often adjusted around mid-range values to maintain sharpness across both foreground and background elements. Shutter speed varies depending on lunar brightness, sometimes extending several seconds to capture enough ambient light without losing detail in the sky.
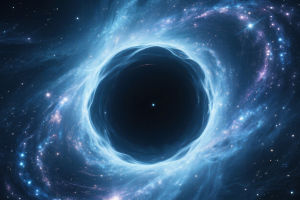
3. Revealing the Milky Way with Controlled High ISO Exposure
The Milky Way presents one of the most demanding yet rewarding night photography subjects due to its faint luminosity and structural complexity. Capturing its core requires pushing ISO sensitivity into higher ranges, typically between 3200 and 6400, depending on sensor performance and ambient conditions.
A wide-aperture lens—ideally f/2.8 or faster—allows sufficient light intake to preserve detail in the galactic structure. Shutter speed must be carefully controlled, usually between 20 and 30 seconds, to prevent star movement from turning into streaks rather than defined points.
A wide-angle lens is commonly used to frame both the sky and landscape together, providing context and scale. When executed correctly, this technique reveals dust lanes, star clusters, and subtle gradients of light that are otherwise invisible to human vision.
4. Creating Atmosphere in Urban Night Environments
Urban night photography introduces artificial light sources such as streetlamps, neon signs, and vehicle headlights, which behave differently from natural illumination. Fog or mist can dramatically enhance these conditions by diffusing light and adding depth to the scene.
A balanced starting point often includes moderate ISO values, an aperture around f/8 for overall sharpness, and shutter speeds adjusted according to the intensity of city lighting. Unlike astrophotography, precision here depends less on extreme exposure settings and more on controlling contrast between illuminated and shadowed areas.
5. Painting Motion with Light Trails
Light trails from moving vehicles offer a dynamic interpretation of time within a single frame. This technique relies on long exposure photography, typically between 10 and 30 seconds, depending on traffic speed and density. A smaller aperture such as f/8 helps maintain sharpness in static elements like roads, bridges, or buildings, while a low ISO prevents unwanted grain from accumulating during the prolonged exposure.
The key is positioning—elevated viewpoints such as overpasses or bridges allow traffic patterns to form natural flowing lines across the frame. Rather than freezing a moment, this method visualizes movement itself, turning headlights and taillights into continuous strokes of light that reshape urban geometry.
Additional Technical Considerations for Night Photography
Manual Focus for Precision
Low-light conditions often confuse autofocus systems, especially when contrast is minimal. Switching to manual focus ensures greater accuracy, particularly when paired with live view magnification to fine-tune distant stars or city lights.
White Balance as a Creative Tool
Night lighting varies widely, from warm sodium streetlights to cool lunar reflections. Adjusting white balance can either correct color accuracy or intentionally enhance mood, such as emphasizing cold tones in astrophotography or warm hues in urban scenes.
Lens Quality and Light Performance
Fast lenses with wide apertures significantly improve night shooting efficiency by allowing more light to reach the sensor. This reduces reliance on extremely high ISO values and helps preserve image clarity in challenging environments.
Patience and Environmental Awareness
Night photography is often defined by waiting—whether for traffic patterns to align, clouds to clear, or stars to emerge. Conditions change constantly, and successful results depend on observing and adapting rather than rushing the process.
By mastering these five approaches—star trails, moonlit landscapes, Milky Way imaging, urban night scenes, and light trails—you gain the ability to interpret darkness as a dynamic canvas rather than a limitation. When technique meets patience, the night stops being a challenge and becomes a storytelling space waiting to be revealed frame by frame, inviting you to discover what only darkness can show.